This tutorial will cover the information on how to manually restore a cPanel backup (sites, databases and emails). It will help you to protect your data and will allow you to merge/separate a few cPanel accounts.
Legend
domain.com – primary domain associated with your cPanel account
addon.com – domain added as an addon to the same cPanel account
domain.com has a Prestashop (popular e-commerce engine) installed on it and WordPress (blog engine) on addon.com
Below you will find an easy step-by-step example with the general tips to do so:
for cPanel paper_lantern theme
for cPanel paper_lantern theme:
1. Files restoration
2. Databases restoration
3. Updating configuration files
4. Emails restoration
1. Files
Let’s take a look at the situation where you have a full cPanel backup on PC.
wget https://domain.tld/path-to-file/

Go to cPanel > Files section > File Manager menu.
Click on Settings button in the upper right corner, check the box for Show Hidden Files (dotfiles) and click Save. If this option is not selected you will not be able to see hidden files and they will not be copied: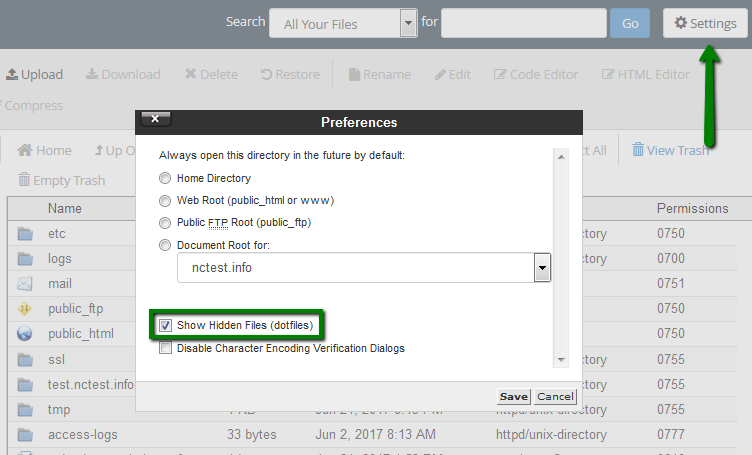
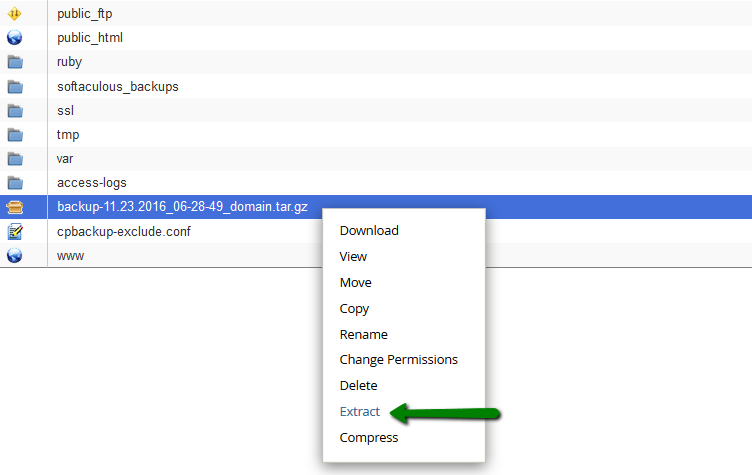
Next, select the backup file, right-click on it and choose Extract or click on the corresponding button in the top bar:
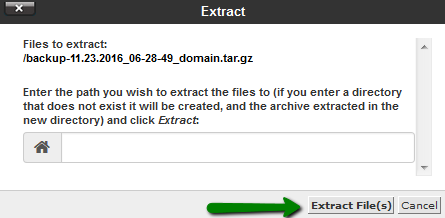
You will see the extraction results table with the list of the restored files, just close it.
Now click on the Reload button on the top and you will see the newly created backup folder backup-11.23.2016_06-28-49_domain, let's open it: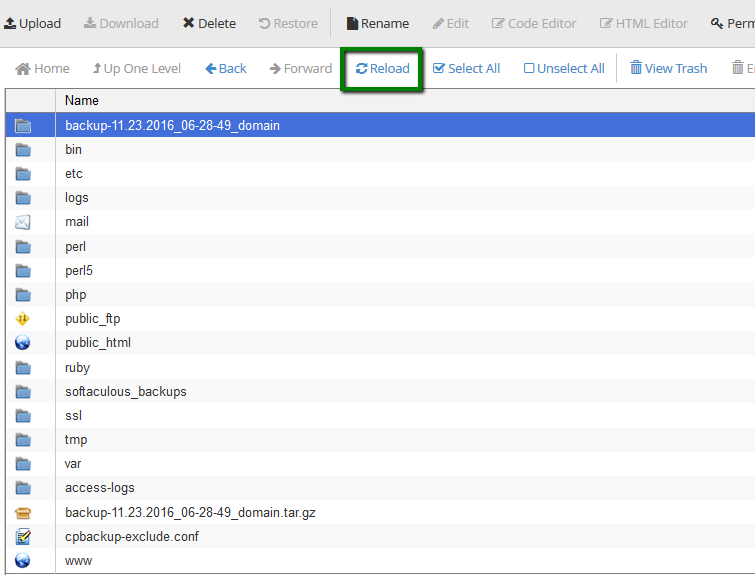
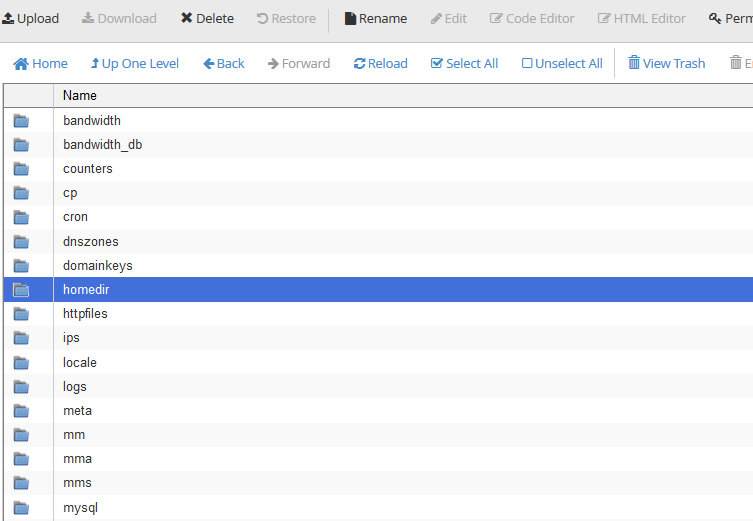
There will be many different folders. The important are “mysql” and “homedir.” In the “mysql” directory, you can find the database dumps for your hosting account. In the other, “homedir,” the files can be found. Other directories store the information related to your hosting account such as cron jobs, SSL certificates, addon domains, some metadata about your account, etc.
Next, open the public_html folder: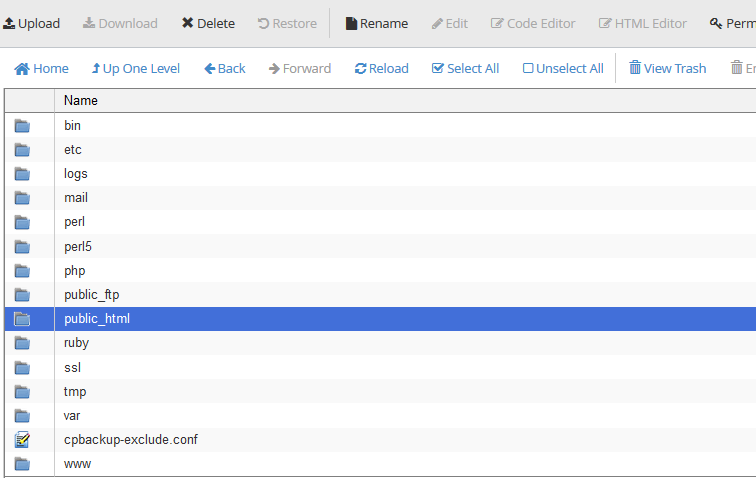
It is the document root (folder with files) for domain.com, so it contains all Prestashop files. Also, there is a folder addon.com, which is the document root for addon.com domain with WordPress files.
So we can just copy everything to our home/user/public_html folder (which is currently empty).
Click on Select all, right-click and choose Copy: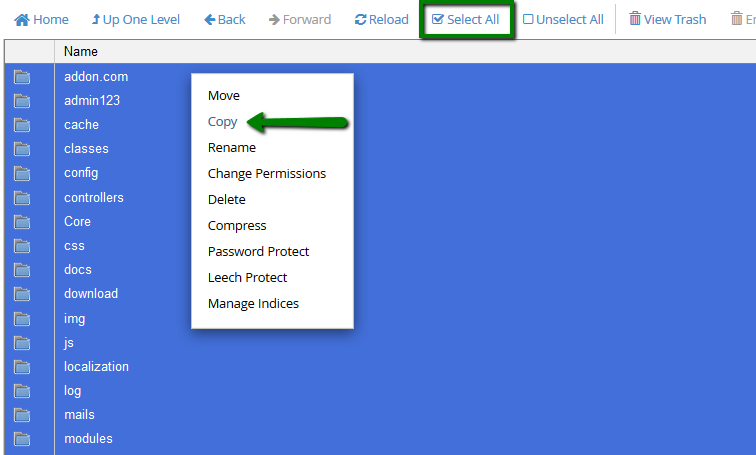
In the pop-up window enter /public_html and click on the Copy files button: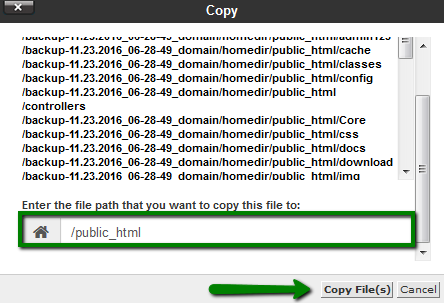
Now you can check public_html folder, all the files should be already there: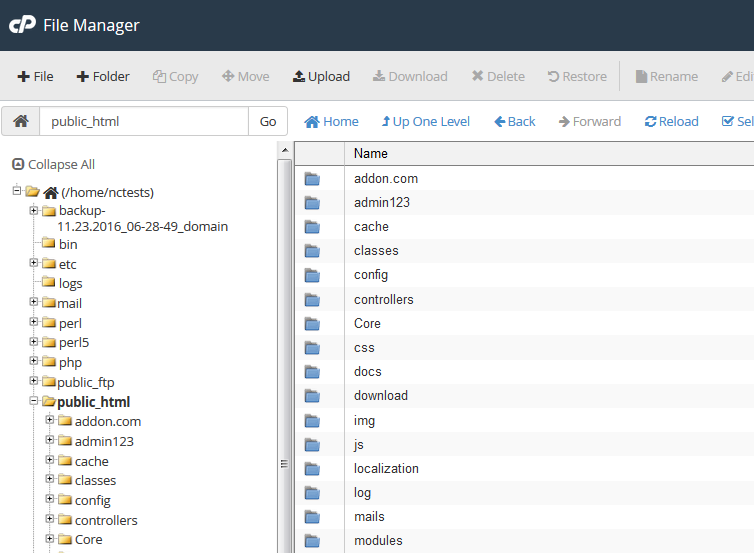
2. Databases restoration
Below, you can find the default paths to the config files for various CMS and frameworks.
| Application name | Path to the config file |
|---|---|
| WordPress | website_directory/wp-config.php |
| Joomla | website_directory/configuration.php |
| PrestaShop | website_directory/app/config/parameters.php or website_directory/config/settings.inc.php |
| Moodle | website_directory/config.php |
| Laravel | website_directory/.env |
| Codeigniter | website_directory/application/config/database.php |
| Drupal | website_directory/sites/default/settings.php |
| OpenCart | website_directory/config.php |
| MediaWiki | website_directory/localsettings.php |
| WHMCS | website_directory/configuration.php |
In case your CMS or web framework is not listed in the above table, we suggest looking for a file similar to the one which has some configurations inside. These files are usually named as “config.php”, “configuration.php”, “db.php”, “database.php”, “settings.php” and are easy to find.
Find the mysql folder and open it: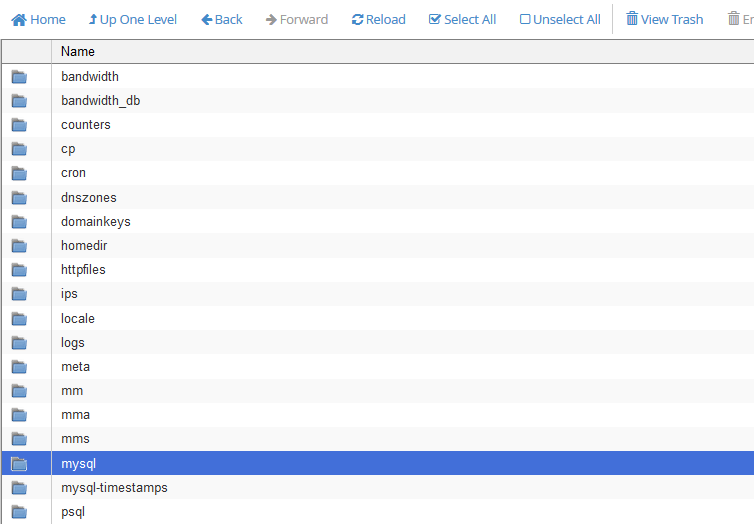
You will see some .sql files. These are backups of your mysql databases. They will be named respectively to your domain name. Hereinafter we will use nctests_pres574.sql (Prestashop database) and nctests_wp369.sql (WordPress database) as examples.
Let’s right-click on them (one per time) and download to our PC: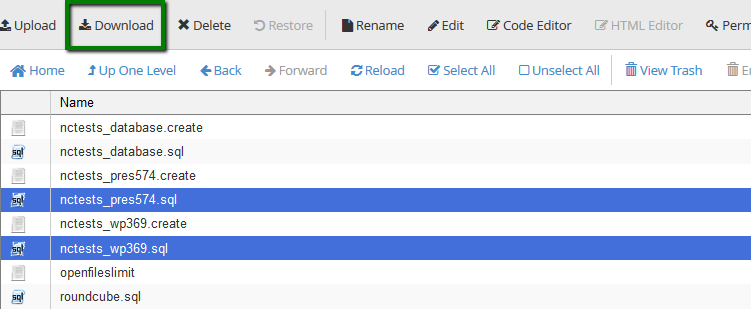
Now we need to restore them. There are several ways to do this:
1. Restoration from cPanel > Backups menu:
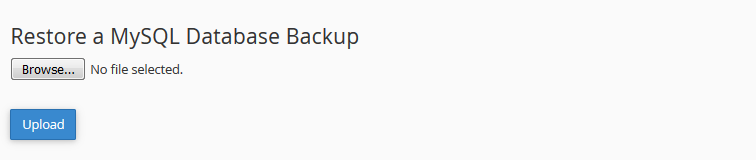
Choose the previously downloaded .sql file on your PC and click Upload.
Then you will need to create a database, user and add the user to the database in cPanel > MySQL databases menu (you can use the same database user and password or create new).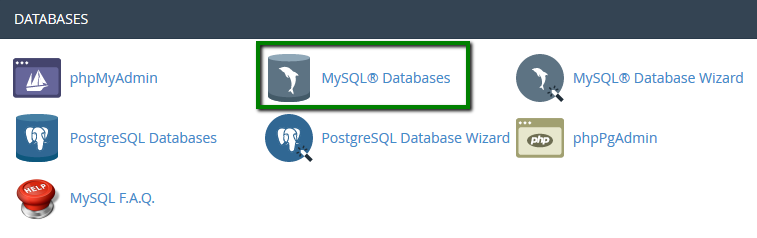
Create a database: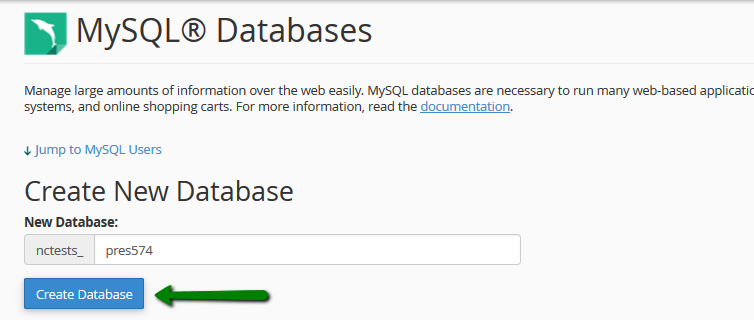
Create a database user (save the password, we will need it later):
Add the user to the database, in the pop-up window check the option All Privileges and click on save changes: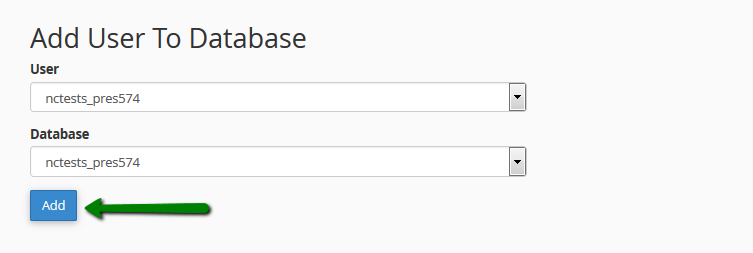

If everything is correct, you will be able to see your newly create database with the assigned user: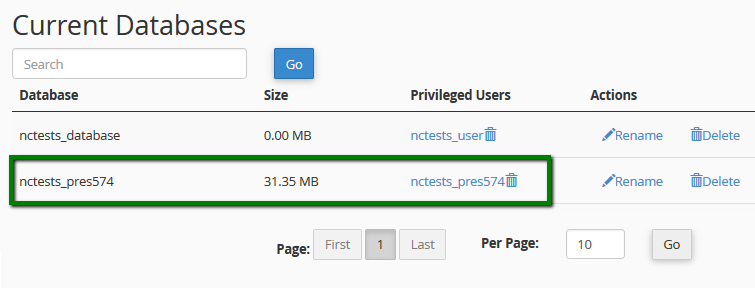
If you need more detailed information, refer to this guide.
At first, you need to create the database, database user and password MySQL Databases menu. We have already done but the database itself is still empty.
Now open cPanel > phpMyAdmin menu: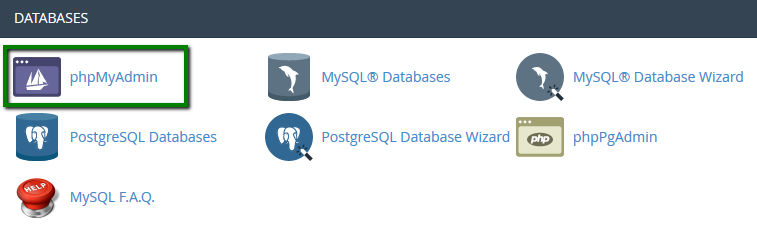
Click on + on the left of the cPanel username and click on the database name: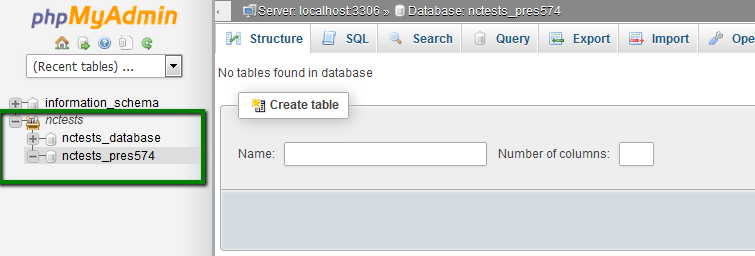
Click on Import in the right top bar and browse to the corresponding .sql file on your PC (here nctests_pres574.sql):
Scroll down and click Go to start the import. You will see a green notification that your database was successfully imported. If you need more detailed information, refer to this guide.
mysql -u nctest_example_dbuser_restored -p nc_test_example_sitedb_restored < /home/nctest/backup/mysql/nctest_example_sitedb.sql

3. Database configuration files
We are almost done. The last step is to update the configuration files of WordPress and Prestashop with the correct database details.
Browse public_html folder and find the config folder: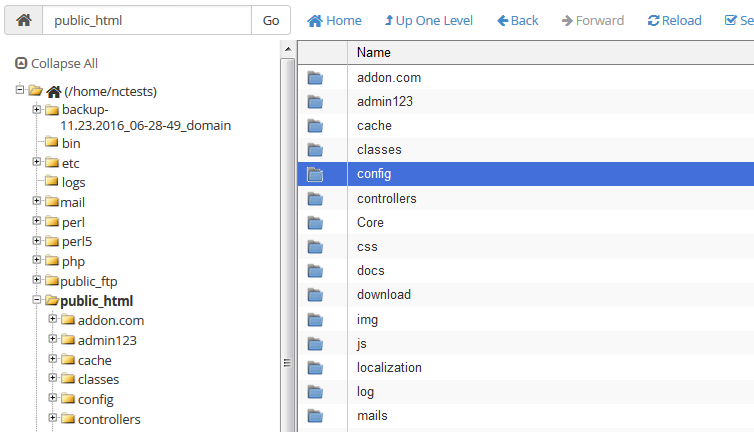
Open it, select settings.inc.php (Prestashop config file with database details) file, right-click on it and choose Edit: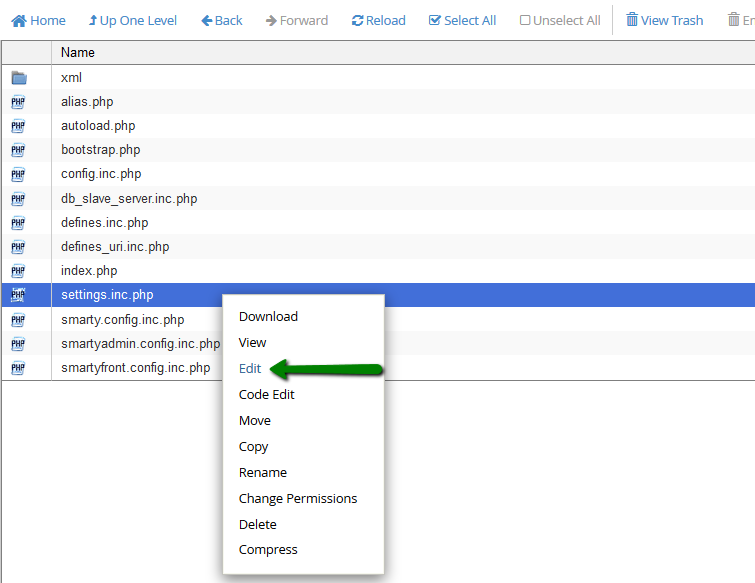
Find the following 3 lines and make sure that they have valid data: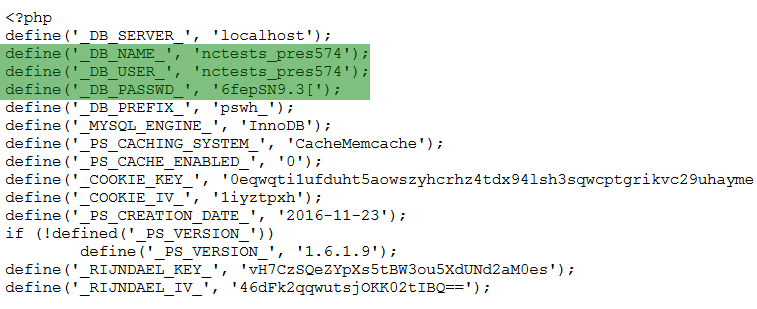
That’s all for Prestashop, now it’s needed to perform the similar changes with WordPress.
Open the restored public_html folder and browse to addon.com folder, find the WordPress wp-config.php file, which contains database details. Select it, right-click and choose Edit: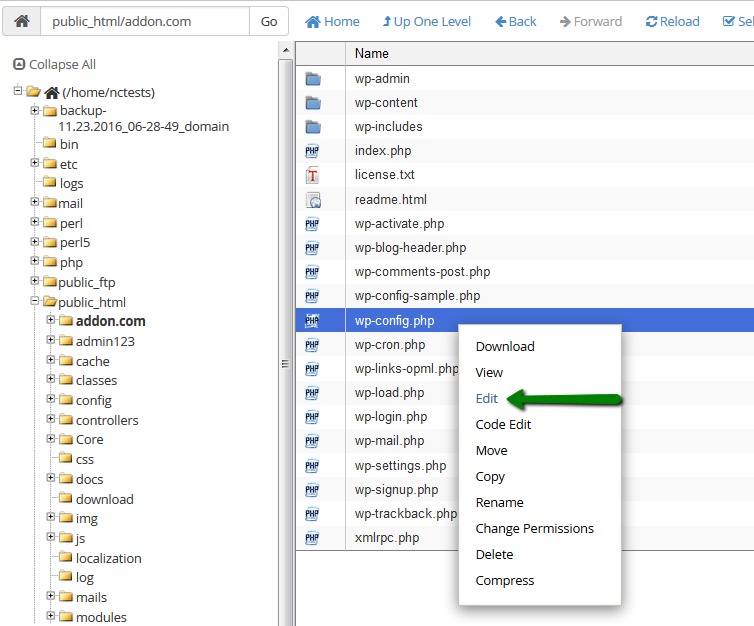
Find the following 3 lines and make sure they have valid data (database name, user and password), change the characters inside quotes if needed and save the file: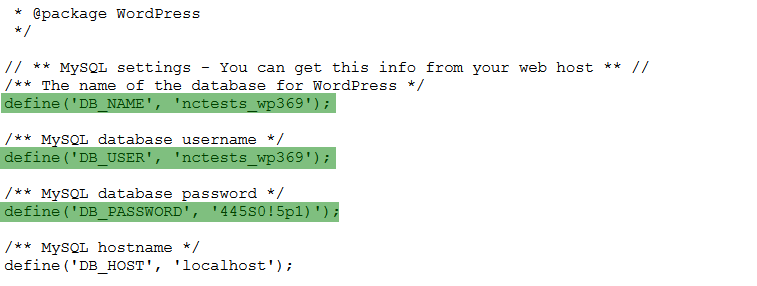
If your domain is already pointed to the hosting server, you will be able to open domain.com or addon.com in the browser and see Wordpress/Prestashop up and running.
4. Emails
In case you had some important emails, you will be able to restore them from a full cPanel backup as well.
For example, we had an email account admin@domain.com with some emails and occasionally deleted it. But we have a full cPanel backup or Home folder backup.
First, it is necessary to recreate the same mailbox from cPanel > Email Accounts menu. You may refer to this guide.
Now, browse to the backup folder > homedir folder in File Manager menu and open the mail folder, select domain.com.
NOTE: It is necessary to turn Show Hidden Files (dotfiles) option on before copying any folders. Otherwise, hidden folders and files will not be copied. You can do that by clicking on Settings button in the upper right corner. Check the box for Show Hidden Files (dotfiles) and click Save:
See admin folder? It contains all our folders with emails: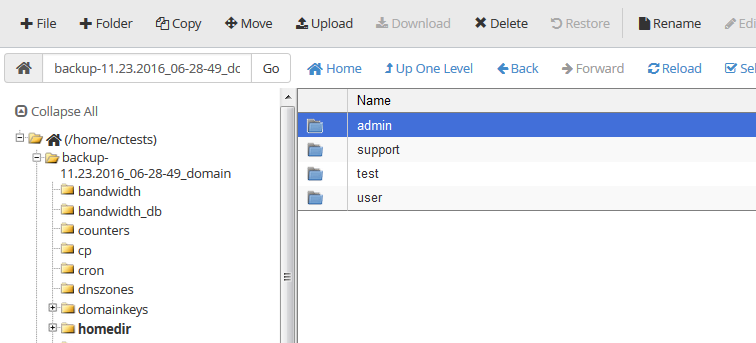
Open it, click the Select all button and click Copy: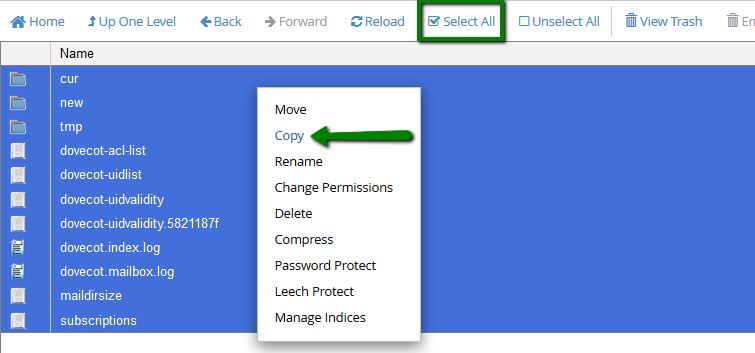
Then in the pop-up window put the following path /mail/.contact@domain_com and click Copy files: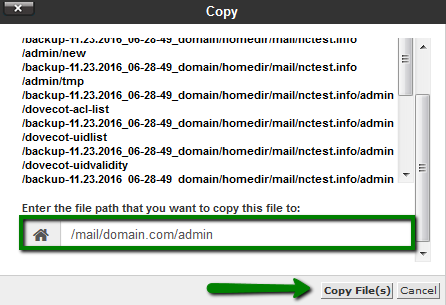
That’s all, check your emails via webmail or an email client.
Config files and folders may vary from one hosting provider/script template to another, but the main points remain the same.
for cPanel x3 theme:
1. Files restoration
2. Databases restoration
3. Updating configuration files
4. Emails restoration
1. Files
Let’s take a look at the situation where you have a full cPanel backup on PC.
Upload the backup-4.4.2014_domain.tar.gz to your home folder via FTP, select the file, right-click on it and choose Extract or click on the corresponding button in the top bar:
In the next pop-up window you will be able to specify the path to restore the archive to, but let’s leave it empty and just click on Extract files. You will see the Extraction results table with the list of the restored files, just close it.
Now click on the Reload button on the top and you will see the newly created backup folder backup-4.4.2014_20-24-21_domain, let's open it: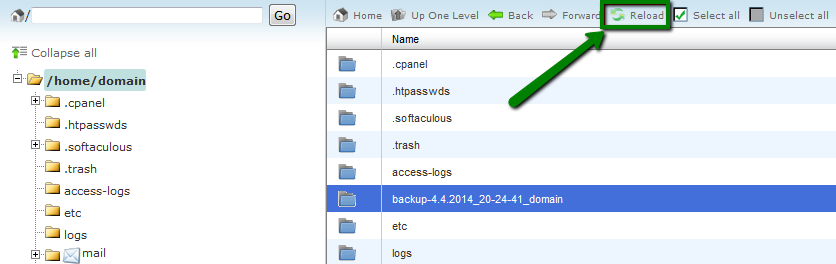
There will be many different folders. Find the homedir, open it, there you will find your home folder: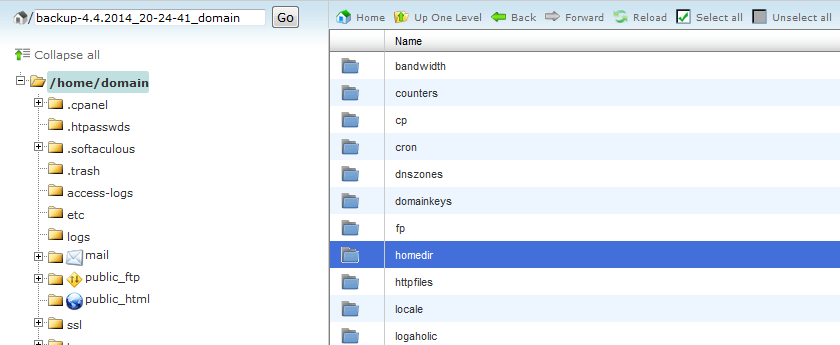
Next, open the public_html folder:
It is the document root (folder with files) for the domain.com so it contains all Prestashop files. Also, there is a folder addon.com, which is the document root for addon.com domain with Wordpress files.
So we can just copy everything to our public_html folder (which is currently empty).
Click on Select all, right-click and choose Copy: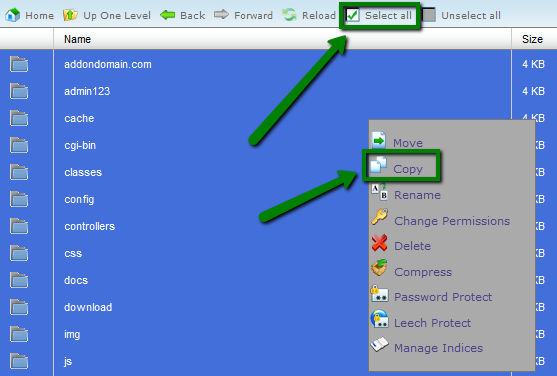
In the pop-up window enter /public_html and click on the Copy files button: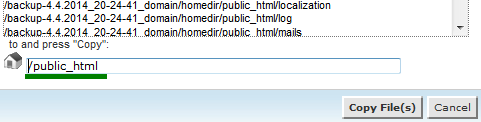
Now you can check the public_html folder, all the files should be already there:
2. Databases restoration
Now let’s get back to the /backup-4.4.2014_20-24-41_domain folder as we need to restore the databases as well.
Find the mysql folder and open it: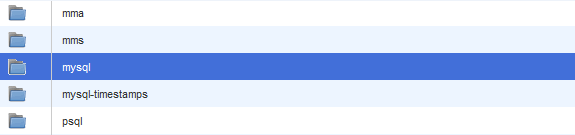
You will see some .sql files. These are backups of your mysql databases. They will be named respectively to your domain name. Hereinafter we will use domain_pres288.sql (Prestashop database) and domain_wp865.sql (WordPress database) as examples. Let’s right-click on them (one per time) and download to our PC: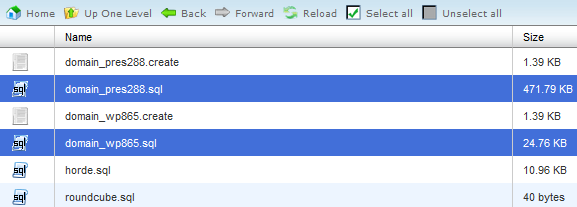
Now we need to restore them. There are 2 ways to do this:
1. Restoration from cPanel > Backups menu:
Choose the previously downloaded .sql file on your PC and click Upload.
Then you will need to create a database user and add the user to the database in cPanel > MySQL databases menu (you can use the same database user and password or create new):
Create a database:
Create a database user with some password (save the password, we will need it later):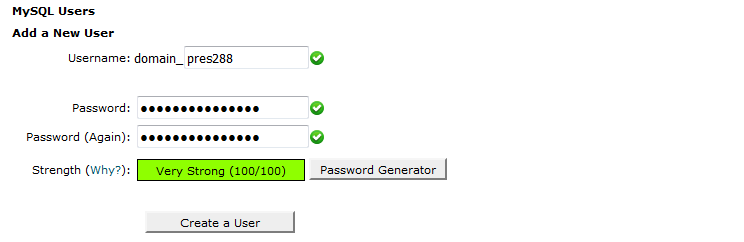
Add the user to the database, in the pop-up window check the option All Privileges and click on save changes:
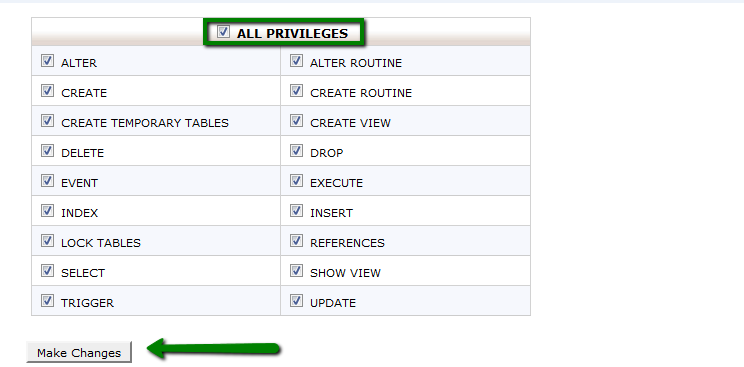
If everything is correct, you will be able to see your newly create database with the assigned user:
If you need more detailed information, refer to this guide.
2. Restoration from cPanel > phpMyAdmin menu
At first, you need to create the database, database user and password in cPanel > MySQL Databases menu.
We have already created the database, user, password and added the user to the database but it is still empty.
Now open cPanel > phpMyAdmin menu: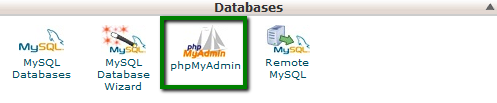
Click on + on the left of the cPanel username and click on the database name: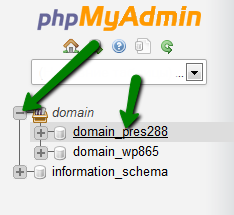
Click on Import in the right top bar and browse to the corresponding .sql file on your PC (here domain_pres288.sql):
and browse to the corresponding .sql file on your PC (here domain_pres288.sql):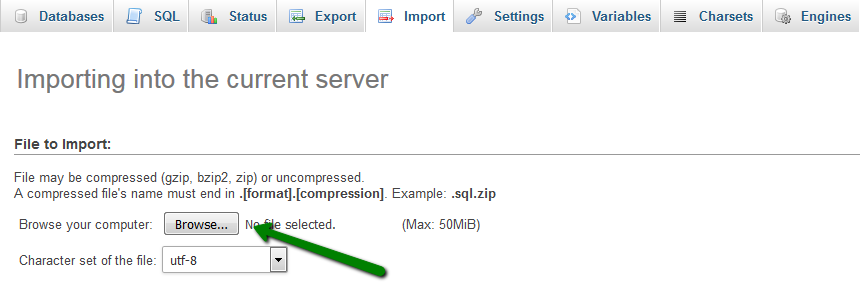
Scroll down and click Go to start the import. You will see a green notification that your database was successfully imported.
If you need more detailed information, refer to this guide.
3. Database configuration files
We are almost done. The last step is to update the configuration files of WordPress and Prestashop with the correct database details.
Open the restored public_html folder and browse to the addon.com folder, find the WordPress wp-config.php file, which contains database details. Select it, right-click and choose edit: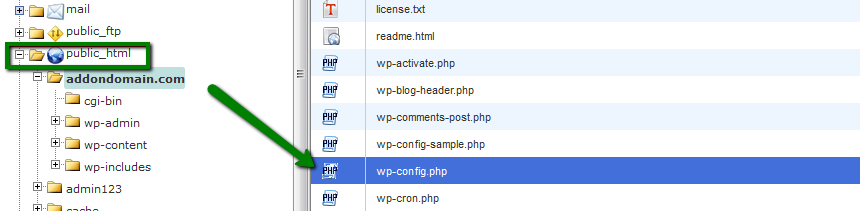
Find the following 3 lines and make sure they have valid data (database name, user and password), change the characters inside quotes if needed and save the file: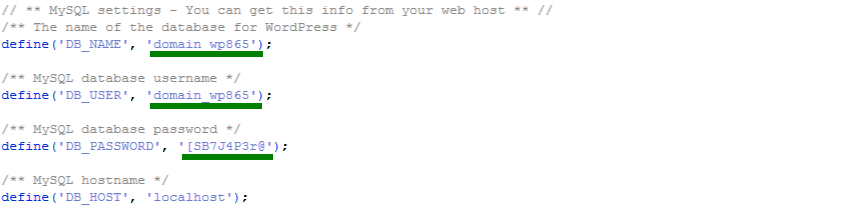
That’s all for WordPress, now it’s needed to perform the similar changes with Prestashop.
Browse back to the public_html folder and find the config folder: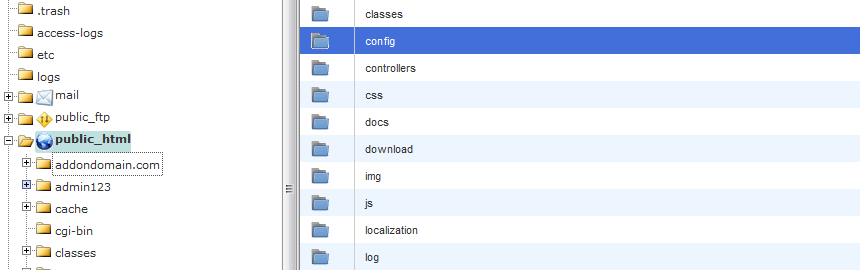
Open it, select settings.inc.php (The Prestashop config file with database details) file, right-click on it and choose edit: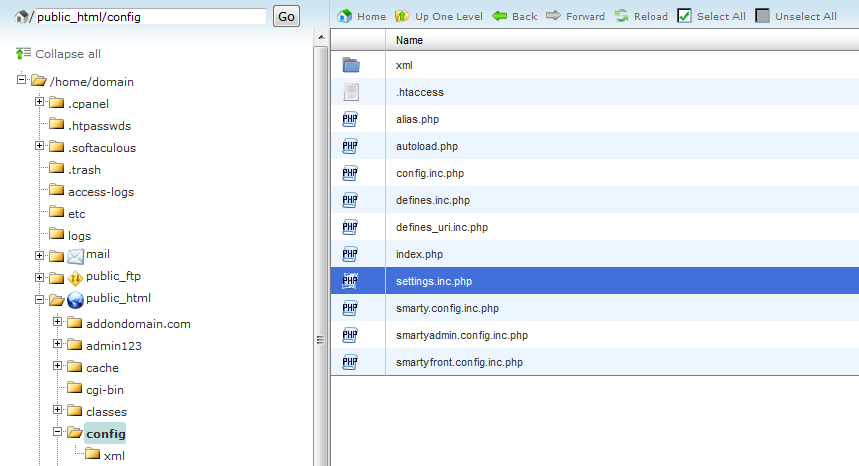
Find the following 3 lines and make sure that they have valid data. Similar to what we did to the wp-config.php file: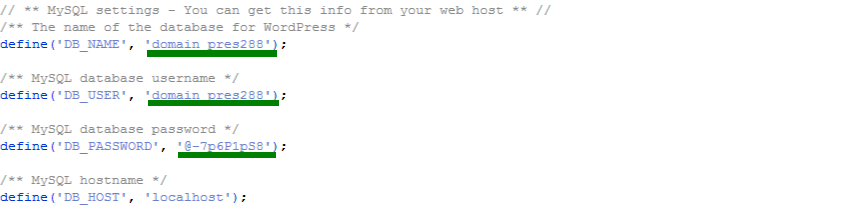
If your domain is already pointed to the hosting server, you will be able to open domain.com or addon.com in the browser and see Wordpress/Prestashop up and running.
4. Emails
In case you had some important emails, you will be able to restore them from a full cPanel backup as well.
For example, we had an email account contact@domain.com with some emails and occasionally deleted it. But we have a full cPanel backup or Home folder backup.
First, it is necessary to recreate the same mailbox from cPanel > Email Accounts menu. You may refer to this guide.
Now, browse to the backup folder > homedir folder and open the mail folder.
See .contact@domain_com folder? It contains all our folders with emails: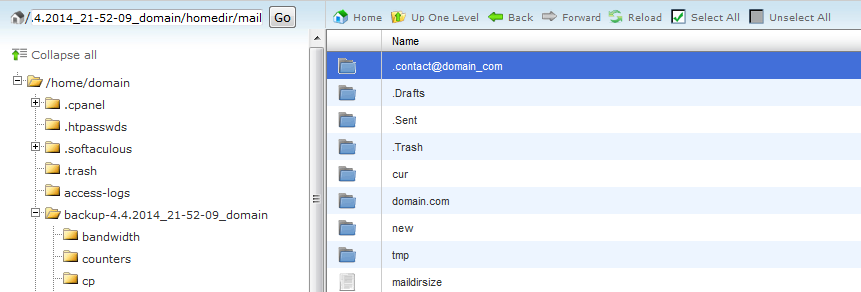
Open it, click the Select all button and click Copy: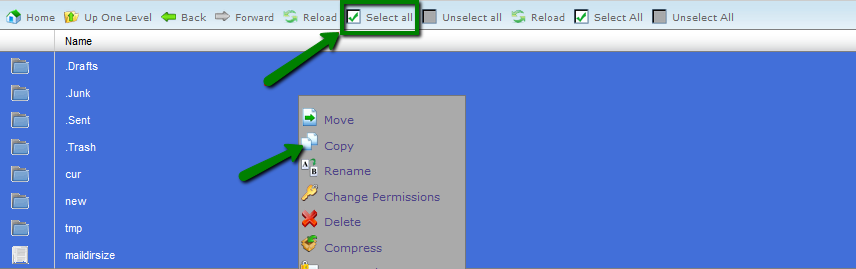
Then in the pop-up window put the following path /mail/.contact@domain_com and click Copy files:
That’s all, check your emails via webmail or an email client.
Config files and folders may vary from one hosting provider/script template to another, but the main points remain the same. If you cannot find the corresponding files or not sure what details to put, feel free to contact us via live chat or ticket using our HelpDesk.
